FGVminiATURES TM
eBayBasic Miniature Bowl Turning
The purpose of this article is to introduce the woodturning methods peculiar to miniature bowls. No attempt is made to teach basic woodturning, tool usage, or sharpening - it is assumed you already have those skills.
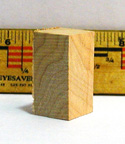 Our starting point will be a 3/4 in. square block 1 1/2 in. long. This is the basic size I use for turning miniatures; I can make a vase, 2 or 3 bowls, or a vase and a bowl from one of these blanks. (For this article, I will be using the bottom third of a maple blank from which a vase has already been turned.)
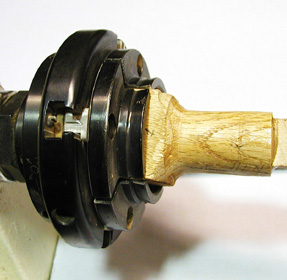
Since miniatures don't incur as much stress as full size turnings, you can attach them with CA glue to a waste block and chuck the two pieces using a scroll chuck (a screw chuck will also work). I favor the use of waste blocks because they are cheap, easy to make, allow you to use all of your blank, and they provide a method for accurate rechucking.
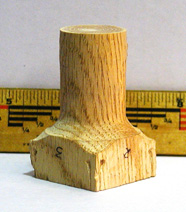 The waste block used in this example is a piece of Oak 1 1/2 inches square and about 3 in. long (easily made from a 2x4, 2x6, etc.). It has been turned round for about 75% of its length, leaving 1/2" to 1" square on one end to be gripped by the chuck. The block doesn't have to be Oak, but it should definitely be a hardwood, as the jaw pressure from the scroll chuck will deform the corners.
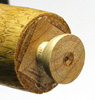
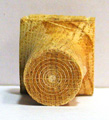 Note that concentric circles have been cut into the end of the waste block. These circles help center the blank and also create glue channels which help hold it. The circles were cut with the tip of a skew chisel.
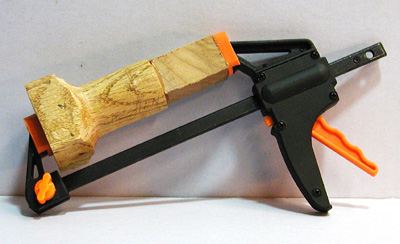 Attach the blank to the end of the waste block using thick CA glue. Clamp and set aside for at least an hour before you begin turning. You could use accelerator and start turning right away, but if the glue isn't thoroughly set underneath the blank you could knock it off as you are roughing it down. This usually results in some unnecessary down time for repairs.
 When mounting in a scroll chuck, mark the sides of the waste block to correspond with the jaw numbers on the chuck. This will make the assembly easy to reposition accurately later for sanding, oiling, finishing, whatever. I usually keep 6 of these assemblies going at a time. This allows me to work on one piece while the finish is setting up on the other(s).
If you don't have a scroll chuck, a screw chuck will work just as well.
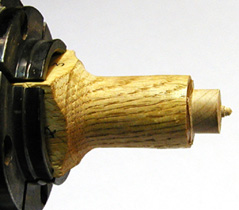 The first thing you have to do is round the blank off. In this case, I am using the remainder of a blank that has already been used to turn a vase. (Making of the vase is covered in the FGVminiATURESTM Basic Miniature Vase Turning article.
Next, establish the outside shape using a 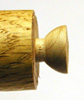 sharp bowl gouge and/or a skew. If you must use a scraper, angle it for a shearing cut; a straight scraping cut will leave the surface rough enough that you may have to significantly reduce the diameter or alter the shape to get it smooth. In large turnings this problem is insignificant; in miniatures you can lose your basic shape at the outset by leaving too rough a surface.
Sand and finish the outside. Despite what many "purists" would say, I think sandpaper is an acceptable shaping tool - especially in miniatures. After sanding to at least 600 grit, you can put on a coat of Walnut oil - or any other oil, for that matter - to "pop out" the grain of lighter woods like maple, if you like. (If you compare wood that has been oiled to that which has not, you will find that the oil generally accentuates the grain, but also makes the wood appear a little darker and slightly yellowish.) Oil will have little or no effect on darker woods. When the oil is dry, buff with 600 to 1000 grit and add the finish of your choice.
 Now hollow the inside to conform to the shape of the outside and establish the wall thickness. It helps to make a starter hole in the center of the bowl with the point of a skew. Then you can hollow it with a small round nose scraper (made from a screwdriver) or a small gouge.
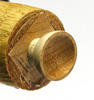 You can hollow from the outside in, or from the inside out - either method works. Just be careful when using a gouge to go from the outside in - one slip and part of the rim will be gone. It helps to use a parting tool or the point of a skew to establish the rim thickness before using a gouge.
 Once the inside is shaped, smooth it and finish just like the outside. Then part off the bowl from the waste block and finish the bottom.
To purchase a wood turning kit for making miniature bowls, or to see a selection of wood turning kits, visit our FGVminiATURESTM store on eBay.